4.30.2009

E-pics: Part II

After we finished up pictures at Zilker Park, we headed to the next location. I originally wanted to take pictures at Spider House, but I thought that it would be extremely crowded on a Sunday evening (with students cramming/studying for the next week). So instead, we went to another cafe: Mozart's. Mozart's is located on the lake, which made for some good pictures.


Even though Mr. Beagle would probably not admit it, he was really nervous about all the picture taking. I think the only reason why I was not as nervous, was that all the e-pics I had drooled over online prior to taking our pictures somehow prepared me for what I should expect. :) We were lucky enought to take our pictures on a pleasant, sunny afternoon; however, this also meant that everyone in Austin decided to take advantage of the nice weather. So there were a ton of people everywhere... needless to say, it made Mr. Beagle's nerves worse. I'm hoping that on our wedding day, being surrounded by our loved ones will not produce the same effect.

Did taking pictures make you nervous?

** all photos made possible by Ashley Smith :)

Napkin Quilt

I love fabric, thread, sewing... of course you already know that from this post. And because of this, I follow quite a few sewing & fabric blogs. Several months ago, I came across this beauty:


Yum. The quilt is from a pattern in Joelle Hoverson's book: Last Minute Patchwork & Quilted Gifts. It was created from cloth napkins Jen sewed for her beautiful outdoor wedding. If it looks familiar, her wedding was featured Winter '09 issue of Martha Stewart Weddings (and it is blogged about here).

As soon as I saw this, I knew I wanted to use this in our wedding. As crazy as I may be for sewing 200+ napkins... I love this idea. If our guests don't end up taking them home, I know they will be put to good use in our home as napkins (it's eco-friendly :) ) or re-purposed into a wedding quilt like Jen. I am still debating on what pattern I want to use for the napkins (there are lots of tutorials out there which I will be sure to post), so I haven't started sewing them yet. I have already bought the fabric though... so you can be rest assured that part II of this post is soon to come!
Are you renting, buying, or making your napkins? Will they be eco-friendly?

4.29.2009

E-pics: Part I

Before I jump into showing pictures, I wanted to talk about how I chose our photographer. Ashley and I were in the same Girl Scout troop for almost 10 years. Yes, we struggled through getting our Silver & Gold Awards and through middle school and high school. After high school, we both went off to college, and about a year ago, I discovered that she had become a very talented wedding photographer (you can visit some more of her great pictures here). As soon as I discovered this, I knew I wanted to hire her for our wedding if she was available, which she was! I am so happy to be working with someone who I feel very comfortable around and who is so good at what she does. So now, without further ado:


The first two pictures were taken at the dog park in our neighborhood (unfortunately we only got two or three good shots with Kingsley- he was super excited our little adventure and got a little distracted by all the activity going on). The remaining pictures are from various spots at Zilker Park. Our original plan was to sneak into to Zilker Gardens, where we got engaged (ssshhh don't tell anyone, they charge a fee for professional photos), but there was a garden festival being held there the weekend we took our pictures and it was ridiculously crowded. Stay tuned for part II!
What made you choose your photographer?

**all pictures courtesy of our lovely photographer, Ashley Smith

4.25.2009

Tickled Pink

So, I went to my caterer's (I'll elaborate on that later) house to pay the remainder of the first half of our catering bill. And she sent this home with me:

How sweet is that?!?!? (Thanks Laura!) I 'm still in shock that my vendor gifted me something. So, I'm inviting you to share: What good experiences have you had as a bride/bride-to-be?

A Wedding Wreath

Remember this post on inspiration? Well, now I'm going to tell you what became of it. :)
I really wanted to display our initials (either first or last or both) somewhere in our reception venue. I love the look of moss covered initials:

However, after my lust subsided, I decided I wanted something a little different. Then I came across this:

source

And an idea popped into my head! :)
The first part of this project was relatively easy and was directly inspired by the above picture:


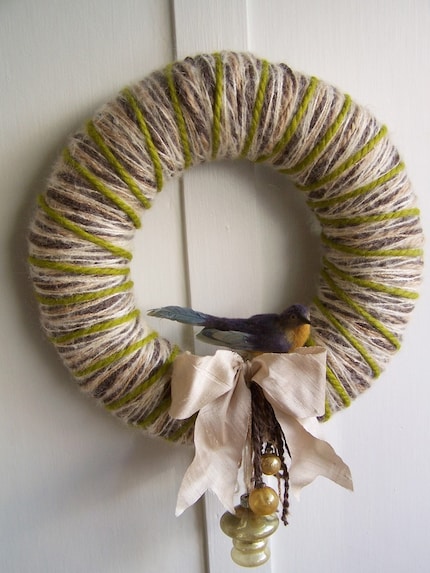
I bought a straw wreath from Hobby Lobby and a spool of yarn from Joann's- of course they were both on sale. (I was not able to find a foam wreath that was large enough otherwise I probably would have used that.) After some trial and error, I decided to keep the plastic wrap on the straw wreath so that bits of straw would not peek out from under the yarn. Then, after I wound my yarn into a ball (it's just easier to work with that way), I wrapped the wreath in yarn. My method of wrapping consisted of 1) making sure the yarn wasn't wrapped too tight, but at the same time wasn't loose enough to where it was falling off & 2) wrapping the yarn so that it overlapped (if it isn't overlapped you can see the inconsistencies of the wreath).

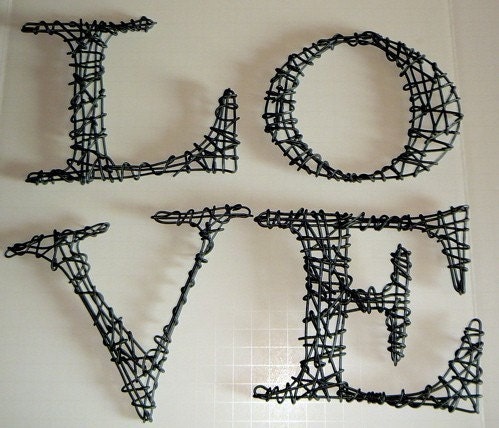
Part 2 of this project was a little more involved. It began with the search for an initial. I looked at wood initials, but they were too big and they didn't seem to mesh with my vision. I then considered cutting an initial out of a block of foam and covering it with something (moss?). However, I thought it might look too crowded in the finished project. Then my search for metal letters began. It was a lot harder than I thought it would be to find something small enough, but finally, Etsy came to my rescue again! I came across Kristine Mays' shop and I knew I had found what I was looking for.


(I should note that I didn't purchase the "Love" letters, but aren't they cute?)
When my Etsy purchase finally arrived (Thank you, Kristine!) I continued working on the wreath. I used some extra fabric that I had left over from this project to embellish and I used clear thread to attach the initial.
The finished product:

The details:


The total cost was around $25 ($15 for the letter & $10 for the remaining supplies). The best part is that we can display it in our home after the wedding! Are you incorporating your initials into your decor?

4.23.2009

E-Pics: the Teaser

Look what I found (after religously stalking my photographer's blog for several days):


I love you Ashley!!!!!!!!!!
Do you love your photographer?

4.22.2009

A Bridal Tea Party

This past weekend, my FMIL threw me a "tea party" themed bridal shower at Green Pastures, a local restaurant in Austin.


The area surrounding Green Pastures is covered in greenery and there are even peacocks on the lawn. It also serves as a very popular wedding venue, and on the day of my shower, a couple had just been married and was on their way to the reception when we arrived.

The shower took place in the "Music Room" in which a very old piano lived.

The "spread" included a variety of teas, finger sandwiches, cookies, scones, and madelines.


I had so much fun trying out the different teas and chatting with the guests. The whole event lasted about 2.5 hours. I didn't open gifts (as is customary at most showers?) in front of the guests, which eased a lot of anxiety that I had been feeling leading up to the event. Unfortunately several guests were not able to make it.. the thunderstorms from the previous day and early morning caused travel problems for a lot of people.

FMIL, me, Mama Beagle

Aren't my mothers so beautiful? :) I wish I would have taken more pictures with the guests, but I didn't think of it until after the fact.

In addition to the gift bags I made for guests, FMIL Beagle gave out gifts to all the guests. What could be more appropriate for a tea party?


She had been collecting tea cups and saucers over the months prior to the shower from thrift stores, and she even picked some up during her trip to England last fall. All the sets were so unique and I think all the guests really liked them.

And even though I told my mother not to bring a gift, she did anyways. This was waiting on my doorstep when I arrived home from work one evening:

Wanna see what it is?

Can you guess?

*swoon* I never knew it was possible to feel this way about dishes. :)

Have you had a bridal shower? Was it themed?

4.18.2009

Bridal Tea: Gifts for the Guests

This weekend, my FMIL hosted my first bridal shower. I knew she was bringing a gift for all the guests, and since I wasn't sure what the proper etiquette was,I decided to get a quick gift together for all the guests as well. Since the shower was a "tea party" theme, I thought a tea themed gift would be appropriate. I went to Hobby Lobby yesterday to pick up some paper bags, which were kind of expensive... and I also found some at Target which were really cheap.

However, the Target bags were really wrinkled and were kind of lopsided when I tried to stand them up... so I went with the alternative. (Lesson learned: cheap is not always better). I also picked up two boxes of tea (what else?) and a package of cookies from Target. I supplemented this with some more cookies that I baked Saturday morning... thank you Martha Stewart.
I trimmed the top of the bags to create the bumpy edge. I created slits in the paper bag with an exacto knife and just pulled a ribbon (bought from Hobby Lobby- isn't it tea partyish?) through, tied a pretty knot, and snipped the ends. Unfortunately, this project was kind of thrown together at the last minute because, like the rest of Austin, I was suffering from severe allergies for most of last week. However, I think the guests still enjoyed it and appreciated the thought and effort.

Martha Stewart's Recipe for French Butter Cookies:
1 c unstalted butter, room temp.
2/3 c packed light brown sugar
1 large egg
1 tsp vanilla extract
2 1/2 c flower(sifted)
1 tsp kosher salt (I didn't include this and they tasted fine)
1/2 c granulated sugar

1. Combine sugar & brown sugar in an electric mixer and cream on high speed until fluffy, 2 to 3 minutes. Add the egg and vanilla and mix to combine. Add the flour and salt, and mix on low speed until the flour is incorporated.
2. Roll the dough into 3-1 1/2 in. diameter logs. Wrap in plastic wrap and refrigerate until firm, at least 1 hour or overnight (I refrigerated mine overnight).
3. Preheat oven to 350. Line baking sheet w/ parchment paper (I used wax paper). Roll the cookie logs in the granulated sugar, coating them evenly, and slice into 1/4 in. rounds. Place them on a baking sheet about 1 in. apart.
4. Bake until golden brown, 15 to 20 mins. Remove from baking sheet and let cool completely. Cookies will keep at room temperature in an airtight container up to 1 week.

Anyone else stumbling through wedding etiquette 101? Are you giving your guests gifts at your shower?

4.13.2009

I've Got Mail

A few days ago, I got this in the mail:


Isn't it cute? My wonderful FMIL, who also made the invite, is throwing a tea party themed shower for me this weekend. She has invited several of Mr. Beagle's relatives and a few of her friends. This is my first "wedding event" and although I'm really excited, I'm a little nervous too. I'm not one to like being the center of attention (in fact, I think I avoid it at all costs), so I'm not really sure how I will feel being the guest of honor at this event. Since Mr. Beagle and I have been dating for quite a while, I have met most of extended family several times. I am also lucky that I am getting wonderful in-laws that get along great with my parents (my mom and FMIL Beagle are becoming good friends). I am hoping that this accompanied by the fact that Mama and sister Beagle will also be attending will ease my nerves before the big day. (I guess this is good practice for our wedding...) Were your wedding events the first time you met your FI's family? Has your wedding brought your families together?
4.09.2009

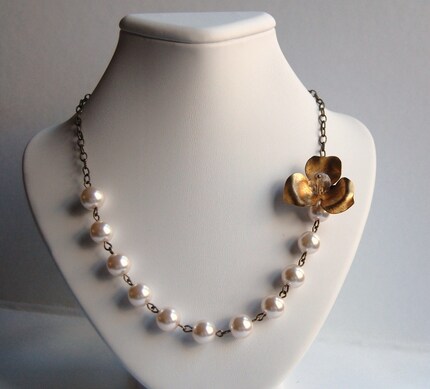
Flowers 'Round My Neck

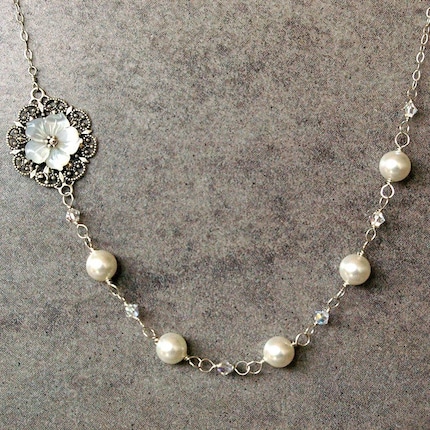
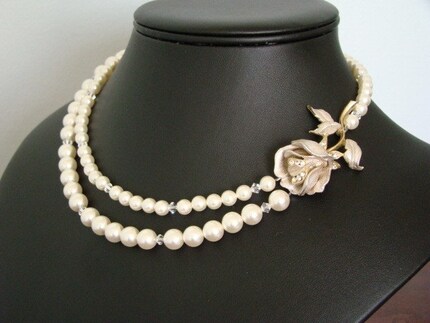
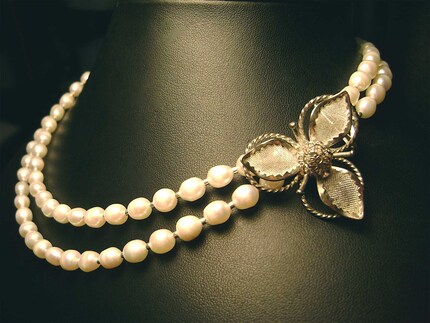
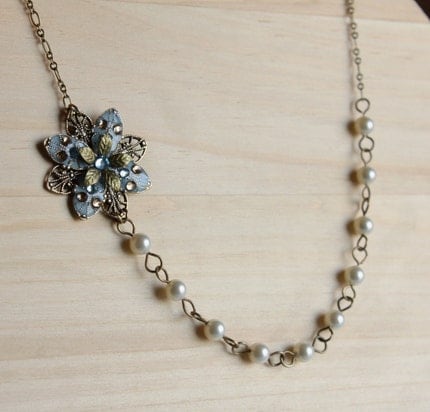
I looooove Etsy. The best part about this fabulous online market is that there are so many options! Of course that's also the worse part about it becase with so many talented sellers, there's just too many goodies to choose from- I want them all!. Lately I've been obsessing over these to neckaces to adorn my neck for our wedding:

luxedeluxe, "Flora Bella"

PenelliBelle, "The Frosted Rose"

Damselle: Melanie Crow

AmberSky, "Maddison"

Femme Petal: erinkeys, "Bloom"

I think I'm leaning to #1 (I love luxedeluxe and am the proud owner of one of her other jewelry pieces) or #5. What do you think? Which do you like best and is your bridal jewelry a tad bit unconventional?

4.06.2009

In the Mail: Save the Dates...

finally! I am almost finished addressing these suckers and they will be in the mail this week! I bought the envelopes online. I had originally ordered a pretty cheap box of 100 ivory envelopes for about $15 (I can't remember the source at the moment), but when they came in, they were thinner than I wanted them..... So I ordered more, from paper-source. In this case, price = quality. I think I paid $4.50/10 envelopes ( I ordered about $25 worth). In the end, I wasn't able to send every save the date in a paper-source envelope... but now I know where to order my envelopes for next time.
Paper-source envelopes, neatly packaged:


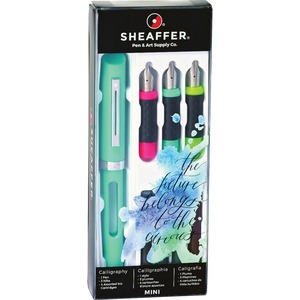
I had thought about just printing addresses on the envelopes (easy right?), but then I saw how nice calligraphy (more like writing with a calligraphy pen) looks... So, I decided that maybe I could address them myself using a calligraphy pen. I narrowed it down to three different types:
Pen w/ non-replaceable ink:

Pen w/ replaceable ink:

source

Dip pen w/ bottled ink (traditional calligraphy pen):

source

Unfortunately, instead of researching these different options beforehand, I ended up buying one of each and trying them out. :) I found option 3 difficult to use (I think this option requires lots of patience and practice... I didn't have enough time for either), so that left me with options 1 & 2. Between the two, I liked option 2 the best because the option of different ink colors and there was also a good selection of pen tips (i.e. skinny to fat) to choose from. I was able to address (including the return address) almost all of our save the dates using one ink vial. (Not too bad!) I ended up buying a calligraphy kit that included several ink colors and three different pen tips. I figured if the save the dates went smoothly... I would be able to use these for our invitations as well (and for any future event that requires pretty writing).
And now for the finished product:


As much as I like to think that I can write in straight lines, I just can't. So I drew light lines on the envelopes before writing the addresses. Then I used a good eraser to remove them. I noticed that the lines were easier to erase on the better quality envelopes than on the cheap ones (so I guess it pays to buy the better quality when it comes to envelopes, this is something I hadn't considered prior to "save the dates", or the wedding for that matter). I also realized that addressing takes a lot longer than it looks. It took me two Saturday afternoons to finish these (about 50 envelopes) up... good to know for next time. :) Any one else using calligraphy on their invites?