4.18.2010

Last Minute Project(s): Prettified Pots + Paper Products & Programs

Alliteration much?

Part 1: Prettified Pots 

I ended up doing our table assignments, um, the week before our wedding- finishing the last of them around fifteen minutes before we left for our rehearsal.  This is something I would NOT recommend, as it was NOT  fun, at all.  I knew I didn’t want to have place cards, just escort cards (if you don’t know the difference- I didn’t- read here), and because I had no idea what to do (at this point, my brain was fried), I emailed my wonderful DOC freaking out asking for advice.  She suggested nixing the escort cards, and made my life somucheasier by recommending a table assignment card for each table instead of a card for each person.  I decided to go with one of her suggestions for creating the table assignments and high-tailed it over to JoAnn’s to pick up supplies.  For 22 tables, I ended up buying 22 terra cotta pots of varying size (the cheap ones) and around seven to ten spools of ribbon.  Why did I need these supplies?  So I could make these**:

IMG_3613
**No, my wedding colors didn’t suddenly change to grey and yellow.  Because this was a last minute project, I did not have time to take pictures.  Fear not!!  because I have a tutorial for you below!

Much, much better than what they started out as, don’t you think?

IMG_3588

Here’s the “how to”:

You’ll also need a glue gun in addition to the pots (for one tiny pot I used about half a spool of ribbon/ ~6’ of ribbon- this sounds like a lot, but it really isn’t).  Also, you can cut down on your costs by buying supplies individually/early on and using coupons.  I LOVE COUPONS. 

Start by hot gluing one end of the ribbon to the pot (picture 1), then pull the ribbon straight down along the side of your pot, holding it on the glued edge, so it doesn’t move around (2).  Make sure once more that the ribbon is straight, then place a glue line along the bottom edge of the pot (3) and press the center of the ribbon down first, then pull either side further in and press down so that the ribbon curves to the pot (4).  I should also note that I left the ribbon on the spool while gluing it to the pot and only cut after the end of the ribbon was glued to the bottom of the pot.

IMG_3597IMG_3598IMG_3599IMG_3605

Repeat steps 1-4 for each quadrant of the pot.  I glued the first two across from each other, and likewise with the second two so that there was even spacing amongst all the strips:

IMG_3606IMG_3607

Then repeat steps 1-4, gluing two ribbon strips between each quadrant strip:

IMG_3610
Do this until your entire pot is covered.  I personally like the overall look of darker ribbon because it is less see through, but that’s just me.  After the pots were covered, I went back and glued these thinner ribbons using the same method:

IMG_3616

In addition to holding table assignments, I think they would look lovely as centerpieces :)

IMG_3618

Part 1.5:  Paper Products

I have a secret, wanna know what it is?  I downloaded a trial version of Adobe Illustrator, for FREE, 2 weeks before the wedding and made our table assignments, table numbers, and programs using it.  (Miss Ribbons made her awesome invites using it too!)  To spice up our table numbers/assignments/programs, I bought a vector image from iStock.  Here is what our table numbers looked like:
 table number copy

I printed them out on ivory cardstock  left over from our table assignments. I bought the cardstock from JoAnn’s, which was on sale for 50 sheets/ $2.50.  Cheap?  Yes!  The best quality?  Probably not, but they served their purpose well.

I printed out each number twice (front & back of our table numbers).  After all 44 squares were printed and cut, I glued each front and back to a ~12” dowel of basal wood (also found at JoAnn’s) and then stuck/hot glued them into a half-cylinder of styrofoam covered with moss.   Yes, I admit, this sounds ghetto and since I have no pictures of this process, you’ll have to trust me when I say, THEY DIDN’T LOOK THAT BAD :)

For the table assignments, I used a similar vector image to the one shown above in our table numbers, and printed them out on 5”x7” sheets of cardstock, stuck them to ~12” dowels of basal wood, and hot glued them into the center of the prettified pots that were filled with styrofoam, topped with moss.  Again, no pictures of this process but I promise, THEY DIDN”T LOOK THAT BAD EITHER.

Part 2:  Programs
I used a similar vector image for our programs and laid out each page (4 pages total) in Illustrator.  This was so much easier to do in Illustrator than in the crappy version of Photoshop that I have- um version 7.0 anyone?  After I got everything looking good, I printed them out on cardstock.  I was able to get two pages per sheet of cardstock and after, some trial and error, I printed on the reverse side also. 
The end result?  Our 8-page program, only used up two pages of cardstock!

I HAVE ANOTHER SECRET:  I was going to cut them all out myself.  I'm pretty sure that when I told Mr. Beagle this, he looked at me like I had two heads  But I didn’t, because I discovered that Office Depot would do it for around five dollars.  Sweet!  So after Office Depot took care of my dirty work in around two minutes (that would have taken me, um, several hours) , I took home my freshly cut paper to assemble our programs.  I hole punched two holes in each sheet and then tied both sheets together with some 50 cent ribbon from JoAnn’s .


Want a sneak peak of what they looked like at our wedding?

10.24.09 W0672photo by our wonderful photog:  Ashley Smith

Are you doing assigned seating at your wedding?  Are you doing anything creative to display escort cards/ place cards/ table assignments?

4.07.2010

Last Minute Project: Wedding Party Gifts

First up: The Guys

I had absolutely no idea what Mr. Beagle’s groomsmen would like as gifts, so I let him take full control of the reigns on this task. He started and ended his search online, getting all that he needed from this site. For the groomsmen, Papa Beagle, and FIL Beagle, he decided to get very large beer mugs, personalized with their initials:


The ushers got flasks, personalized with their initials:


For the Girls:

I gave each of my bridesmaids a grey wrap, to keep them warm in case it was cool later in the evening. The color looked great with their purple dresses and I think it's neutral enough for them to wear again:


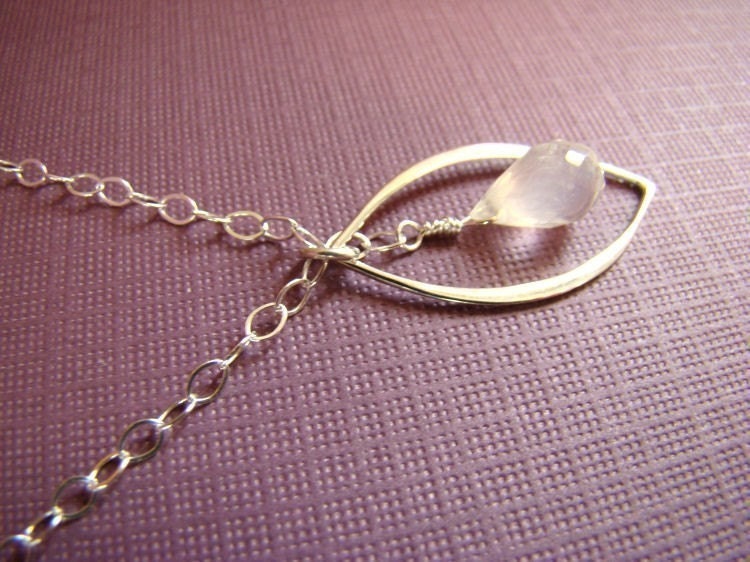
I also decided to get them a piece of jewelry to wear, if they chose, on the big day. I was debating between earrings or a necklace and finally decided on a necklace. I purchased them all from Jeweled Blossoms (I purchased items from her shop prior to the wedding, so I knew her products were great). Again, I tried to choose an item that would both work with their dresses and would be something they could wear again.


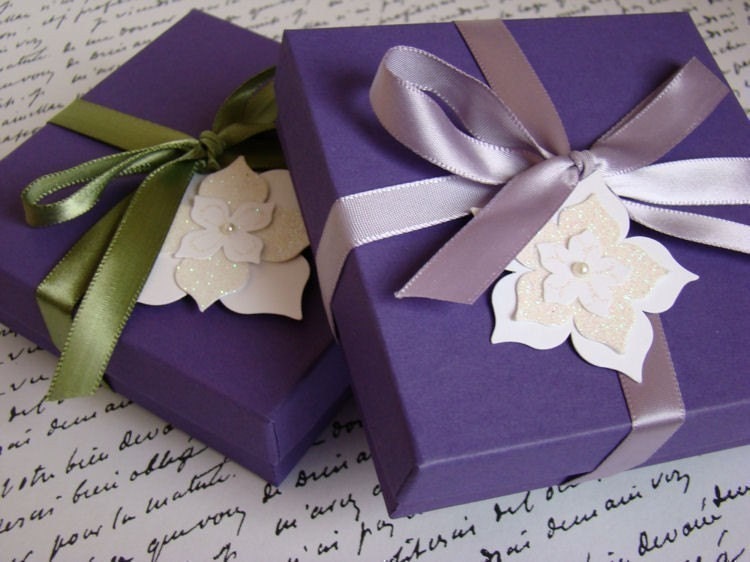
Coincidentally, they were each packaged in purple boxes... appropriate, no?


Finally, I intended to make each bridesmaid a clutch to hold all their necessities, but I ran out of time and only completed two :( So, my MOH ended up receiving one, while I used the other. They were fairly simple to make; however, because this was a last minute project, I didn't take any pictures of the DIY process- a tutorial will have to come later. The (removable) flower was graciously sent to me by Mrs. Margarita :)


Our peeps received their gifts at our rehersal dinner, the night before the wedding and I think they were all well liked! 

What are you getting your bridesmaids/groomsmen? 

4.05.2010

Beagles at the Beach: Part IV

After our excursions to Cabo San Lucas and Santa Maria, we spent the next few days exploring the city closest to where we were staying:  San Jose del Cabo.  In this small town, resides a beautiful mission, which is the foundation of the city.

IMG_3302

IMG_3286 
This is a close up of the tiled detail above the church entrance:

IMG_3288

The alter:

IMG_3291

In Hispanic Catholic culture, the Virgin Mary is a very important figure.  This is a shrine dedicated to her:

IMG_3293

The town plaza is also an important part of the history of San Jose del Cabo. While we were there, local towns people were holding political rallies for an upcoming election.

IMG_3284

IMG_3301

IMG_3334

The architecture around the San Jose was beautiful.  Walls were painted in bright colors, metal and wooden doors everywhere, and nooks and crannies filled with small shops.  (This town reminded me so much of Santa Fe, NM).

    IMG_3296 IMG_3298IMG_3323

Bougainvilleas were blooming everywhere, so pretty.

IMG_3300IMG_3325

We came across some very large Catrinas (on stilts) wandering around the square.  They appeared to be looking for tips, so we admired them from afar.

IMG_3333

One evening, we decided to have dinner in the city. We chose this place- La Panga:  (One of the many advantages to traveling with someone who is bilingual is that you can find out all the best places to eat from the locals :D)

IMG_3327

IMG_3330

While Mr. Beagle really only cares about the quality of food at a restaurant, I have to admit, ambience plays a big role in my dining experiences.  La Panga had the best romantic atmosphere with twinkle lights every where and secluded tables.  Love, love, love.

IMG_3318

And to meet Mr. Beagle’s requirement, the food was pretty wonderful too!  I dined on salmon atop mashed potatoes, covered in a very yummy cilantro sauce,  and grilled veggies.

IMG_3313

Mr. Beagle was kind enough to wait to dig into his food so I could take this picture :)  He had a traditional Mexican dish:  Chicken Mole with rice & plantains.

IMG_3316

The waiter found out we were on our honeymoon and kindly brought us this beautiful dessert.  It reads Felicidades! (Congratulations!) and portrays two boats meeting.  It was almost too pretty to eat, almost.

IMG_3320

Two happy Beagles after our tummies were filled with the delicious food.

IMG_3311

Before we left our relaxing vacation, we took a few more walks on the beach. 
We admired the rocky beaches and the sandy ones.

IMG_3305

IMG_3309

We took in one last sunset.

IMG_3369

IMG_3378

And before we boarded our plane to leave, I snuck one last picture of the mountains looming in the distance.

IMG_3401

When we finally arrived back in Austin, we were very well rested and relaxed.  It was the perfect honeymoon for the both of us (and I highly recommend it to anyone looking to lounge around for a week).  We also came home to a very, very nice surprise….. Our wedding pictures!  Stay tuned for Beagle recaps to commence very, very soon!

How did we get here?

Beagles at the Beach:  Part III
Beagles at the Beach:  Part II
Beagles at the Beach:  Part I

Last Minute Project: Finding My Scent

Three days before the wedding, I realized I still did not have a perfume to wear on our wedding day.  I think it was one of those items on my checklist that I kept putting off because I thought it wouldn't take long (yeah, right).  So, three days before the wedding, I treked over to my nearest Ulta in hopes of finding the perfect scent.  Something that would knock Mr. Beagle's socks off, in a good way :) 

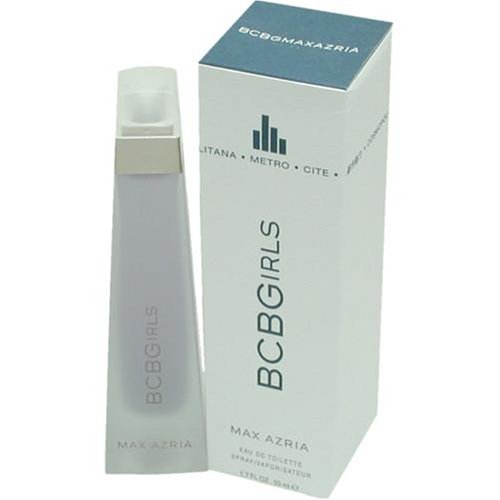
I usually wear this perfume (which is unfortunately no longer in production) on a daily basis:


I was looking for something similar (light, airy), but different (memorable).  Also, the packaging had to be cute just in case there were any pictures taken of the perfume bottle (um, yes, I hate to admit this was my thought process in the days before the wedding).  Looking back, I really wish I would have taken someone with me, as it may have helped speed up the process.  I would not recommend putting this off to the last minute- it was a very stressful experience and I felt like I was wasting time because there were other, more pressing, matters on my "to-do"list.  Had I started my search earlier, I could have also ordered the perfume online, which I am now finding to be significantly cheaper....

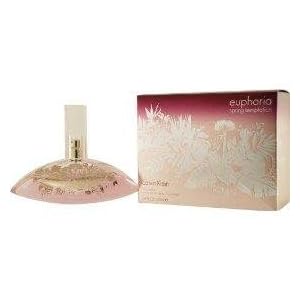
Anyways, after spending nearly two hours in Ulta, thuroughly regretting my decision to not go to Nordstrom, and getting some strange looks from the sales staff, I finally found my wedding scent:


I love the scent- it's a little stronger than my everyday perfume, but it smells wonderful and the bottle is so beautiful.  Plus, I still wear it after the wedding, which proves my search was not a complete waste of time and money!  For those of you still looking, I stumbled across Sephora's Fragrance Finder website a while back via Mrs. Jasmine.  It's a great tool for recommending fragrances you might like based on your favorite scents.

Are you wearing a "special" perfume on your wedding day?  How did you decide what scent to wear?

4.04.2010

Beagles on the Beach: Part III

**I’ll warn you ahead of time, this post includes a TON of pictures.

After we spent an entire day playing tourist in Cabo San Lucas, Mr. Beagle and I were more than ready to relax on a boat and indulge in some good food and drinks.  Finally, after waiting by the dock, it was time to board the huge catamaran that would take us to see the famous arches.

IMG_3156IMG_3158

By the time we left the harbor, the sun was on it’s way down, and there was a very nice breeze to cool us off.  I still can’t get over how beautiful the water was.

IMG_3163 
IMG_3167 IMG_3162

I think I would love living in a condo lining this shore.

IMG_3168

This tiny beach between the rocks known as “Lover’s Beach”.  If you look closely, you can see a few sailboats in the distance.

   IMG_3173

The rocks leading up to the main attraction were so amazing.  They looked so magnificent jutting out of the water.

IMG_3177 
The famous arch aka Arch of Poseidon aka Land’s End Arch.  It marks the point where the Pacific Ocean meets the Sea of Cortez.

IMG_3180  
Although they blend in, there are sea lions lounging on one of the rocks.  Can you spy them?

IMG_3184  
Please excuse the ridiculous amount of pictures that are to follow.  The scenery really was breathtaking and the sunset was stunning.  It was so, so hard just to choose a few shots to share with you :)

IMG_3187 IMG_3188 IMG_3190

IMG_3191

IMG_3192   
Lover’s beach, seen from the Pacific Ocean is supposedly called “Divorce Beach”.   I thought this was pretty silly, but we didn’t stop to find out. :D

IMG_3207

A cave that I would have loved to explore and proof that Mr. Beagle was on the boat with me.

IMG_3201IMG_3182

The best part of this short trip?   We were able to take in the amazing sunset in one direction….

IMG_3206  
   
   IMG_3219   

..and see the moon rise in the opposite direction.

IMG_3224


After this point, it got too dark to take any more pictures :(  So, we continued to gaze at the sunset, the moon; we ate, drank, danced (yes danced), and mingled with our fellow cruise-takers.  If you are thinking about going to Cabo any time soon, I really would recommend taking advantage of this tour.  Mr. Beagle and I agreed that it was highlight of our honeymoon.

Finally, our boat docked and we took a leisurely walk back to the mall we explored when we first arrived in the city.  Lucky for us, the This one was dedicated to Mother Teresa:">Dia de Los Muertos decorations were completely set up, candles were lit, and music was playing.  Each alter, which was dedicated to one or two people, was very elaborate in detail.

This one was dedicated to Mother Teresa & Pope John Paul II:

IMG_3240 

One for Michael Jackson:

IMG_3242   

These two were dedicated to Mexican actors:
  IMG_3235

IMG_3236 

The orange flowers used as decorations are Mexican marigolds, a traditional flower used to adorn the alters set up at cemeteries and graves on this holiday.  The flowers and candles were so beautiful at night.:

IMG_3239IMG_3246

It may be a little creepy, but I love these figurines, called Catrinas.  They are prominent in Mexico, but they can also be found in various cities throughout Texas too (Austin included :D).

IMG_3250

After a full day of touring Cabo San Lucas the day before, we somehow managed to wake up bright and early the next morning to go snorkling at a nearby beach called Santa Maria.  Several readers suggested we make this a priority during our vacation and they were absolutely right.  The water was so pretty and clear, as in you can see straight to the bottom while swimming clear!!! (I know, we get excited over the little things, but if you’ve ever swam in the Gulf of Mexico, I’m sure you understand where I’m coming from).

IMG_3251         IMG_3252

I could have stayed there all day, except 1) I’m pale and I was starting to burn and 2) by the time we were ready to leave, several boats were docking and the beach area was getting really crowded (GO EARLY, if you decide to visit this beach!)

We spent the rest of the day relaxing by the poolside until that evening, where we decided to take part in the Mexican Fiesta that was held at our hotel/condo.  Cheesy?  Yes.  Definitely.

    IMG_3271 
Worth it?  Yes, and here’s why:

IMG_3279 
After we finished dinner, several different traditional dancers performed.  The Aztecs are shown below:

IMG_3282 
Unfortunately, Mr. Beagle and I got dragged on to the stage at some point after this, which would explain why I have no other pictures of the rest of the evening's entertainment.

Coming up next:  We explore San Jose del Cabo and our departure (insert sad face).

Miss Something?
Beagles on the Beach: Part I
Beagles on the Beach: Part II