Showing posts with label Invitations. Show all posts

9.08.2009

The Invitations: Part I- Lessons Learned

As I write this post, our invitations are on their merry way to our guests, anxiously waiting to be opened (or maybe that's just me that is anxious). In the mean time, I thought I would fill you in on our invitation deets:

I ordered the invitations and rsvp cards, and respective envelopes, from the White Aisle. Rebecca was really sweet and was super easy to work with. I'm extremely happy with the way they turned out. To save some $$, I decided to make the remaining enclosures... and this is where my problems began.

Lesson #1:
Originally, I had planned on drawing a cutesy map like one of these:


This turned out to be a big fat fail and was not coming together the way I had originally hoped. Although I'm not really sure what my original hope was. I went into my invitations with little idea of what exactly I was trying to put together, it was very hard for me to come up with a design that really meshed. Finally, after many hours of trial and error, I designed a mini-map using a combination of Autocad and Photoshop. On a side note, I would like to add this: these two ladies are tremendously talented. Map making = lots of time consumed.

Lesson #2.
I had the mind set that, once I finally received my invitations, putting them together would be easy as pie. This was wrong. I think part of this stems from the fact that I didn't really want to put that much effort into the invitations in the first place. In the beginning, I really didn't see the importance of spending lots of $$ and time on something that people would most likely discard. However, once I received my big box of invitations and rsvp cards, they seemed too neatly packed to just stuff in an envelope and send. (I may have also felt to live up to since my paper was going to be streamed live on the Internet). Thus, a vision was created and molded. Something that took a long while to perfect.

Lesson #3
The assembly process was extremely unorganized. Because I had taken so much time designing a map and a vision, I was rushed to get these puppies out the door. In fact, most of my Labor Day weekend was spent assembling them. Instead of pre-cutting all my supplies, I intermixed cutting and matting and stuffing- making the process much longer than it should have been. I also underestimated the amount of supplies I needed, which meant I had to take several breaks from the assembly process to get more.

And so, after many trips to Joanns and Hobby Lobby, hours of cutting and matting, an entire Friday spent addressing, my invitations were born. Stay tuned for later this week/early next week for the final result!

What lessons have you learned from your DIY projects?

4.06.2009

In the Mail: Save the Dates...

finally! I am almost finished addressing these suckers and they will be in the mail this week! I bought the envelopes online. I had originally ordered a pretty cheap box of 100 ivory envelopes for about $15 (I can't remember the source at the moment), but when they came in, they were thinner than I wanted them..... So I ordered more, from paper-source. In this case, price = quality. I think I paid $4.50/10 envelopes ( I ordered about $25 worth). In the end, I wasn't able to send every save the date in a paper-source envelope... but now I know where to order my envelopes for next time.
Paper-source envelopes, neatly packaged:


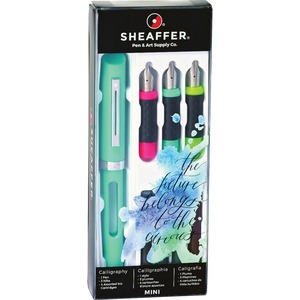
I had thought about just printing addresses on the envelopes (easy right?), but then I saw how nice calligraphy (more like writing with a calligraphy pen) looks... So, I decided that maybe I could address them myself using a calligraphy pen. I narrowed it down to three different types:
Pen w/ non-replaceable ink:

Pen w/ replaceable ink:

source

Dip pen w/ bottled ink (traditional calligraphy pen):

source

Unfortunately, instead of researching these different options beforehand, I ended up buying one of each and trying them out. :) I found option 3 difficult to use (I think this option requires lots of patience and practice... I didn't have enough time for either), so that left me with options 1 & 2. Between the two, I liked option 2 the best because the option of different ink colors and there was also a good selection of pen tips (i.e. skinny to fat) to choose from. I was able to address (including the return address) almost all of our save the dates using one ink vial. (Not too bad!) I ended up buying a calligraphy kit that included several ink colors and three different pen tips. I figured if the save the dates went smoothly... I would be able to use these for our invitations as well (and for any future event that requires pretty writing).
And now for the finished product:


As much as I like to think that I can write in straight lines, I just can't. So I drew light lines on the envelopes before writing the addresses. Then I used a good eraser to remove them. I noticed that the lines were easier to erase on the better quality envelopes than on the cheap ones (so I guess it pays to buy the better quality when it comes to envelopes, this is something I hadn't considered prior to "save the dates", or the wedding for that matter). I also realized that addressing takes a lot longer than it looks. It took me two Saturday afternoons to finish these (about 50 envelopes) up... good to know for next time. :) Any one else using calligraphy on their invites?

3.24.2009

Someone Stop Me.....

Really, I mean it. I need to stop ordering invitation samples.


I'm not sure what's worse: the fact that this picture does not show all of them in my possession or that the one that I *think* we have chosen is not shown (since we haven't ordered or sent them out yet... pics of the final product will have to wait :) ). The problem I struggle with is that every time I think I find *the* invitation that will be ours, I find something I like a little more. Such is the problem with buying invitations online... too many sellers, too many options!

I think I decided to buy our invitations online shortly after I realized that making them all by hand would be a feat far out of my league. However, even though they will not be completely DIYed, I plan on personalizing them some after we order them and before they get mailed.

What's the plan for your invites? Are you taking advantage of all the options the web has to offer?

2.21.2009

STDs

I didn't know what an STD was before I started planning a wedding. In fact, X received a minor scare when I saved a file called "STD #1" on his computer (oops, maybe I should have called it something else). In the beginning, I wasn't going to make STDs. I thought they were a waste of time and money, but the more I perused the web, the more I began to see the necessity for them. It makes sense to notify your family and friends of such an important event. With all the time and effort that is put towards such an event, I wanted to make sure our family and friends would not miss out. I decided to create them myself, so I went to this crafting mecca and searched for my supplies. I ended up getting the paper for half off on sale... yea!


I created a 5" x 5" page template in Microsoft, and created several trial layouts with different font styles, wording, and color. I trimmed the 12" x 12" ivory paper to 5" x 10" strips and started printing:


I trimmed each 5" x 10" strip to a 5"x5" square and used a corner punch to create a design on each corner:


I then cut the purple cardstock into 5 3/4" squares and pasted the ivory cardstock on top of the purple squares with glue strips, centering them with a ruler. I had originally planned to include magnets with an engagement photo and our website, but since we didn't end up taking engagement pics late March and I haven't received images yet... it's not going to happen. I had tossed around the idea of making the stds magnets (by attaching magnet on the back of purple cardstock), but by the time I finally got the list of addresses I needed, I was kind of over this project and ready to move on to something new.
Since I didn't, are you making magnet stds?