10.12.2010

An Autumn Affair: The Guys

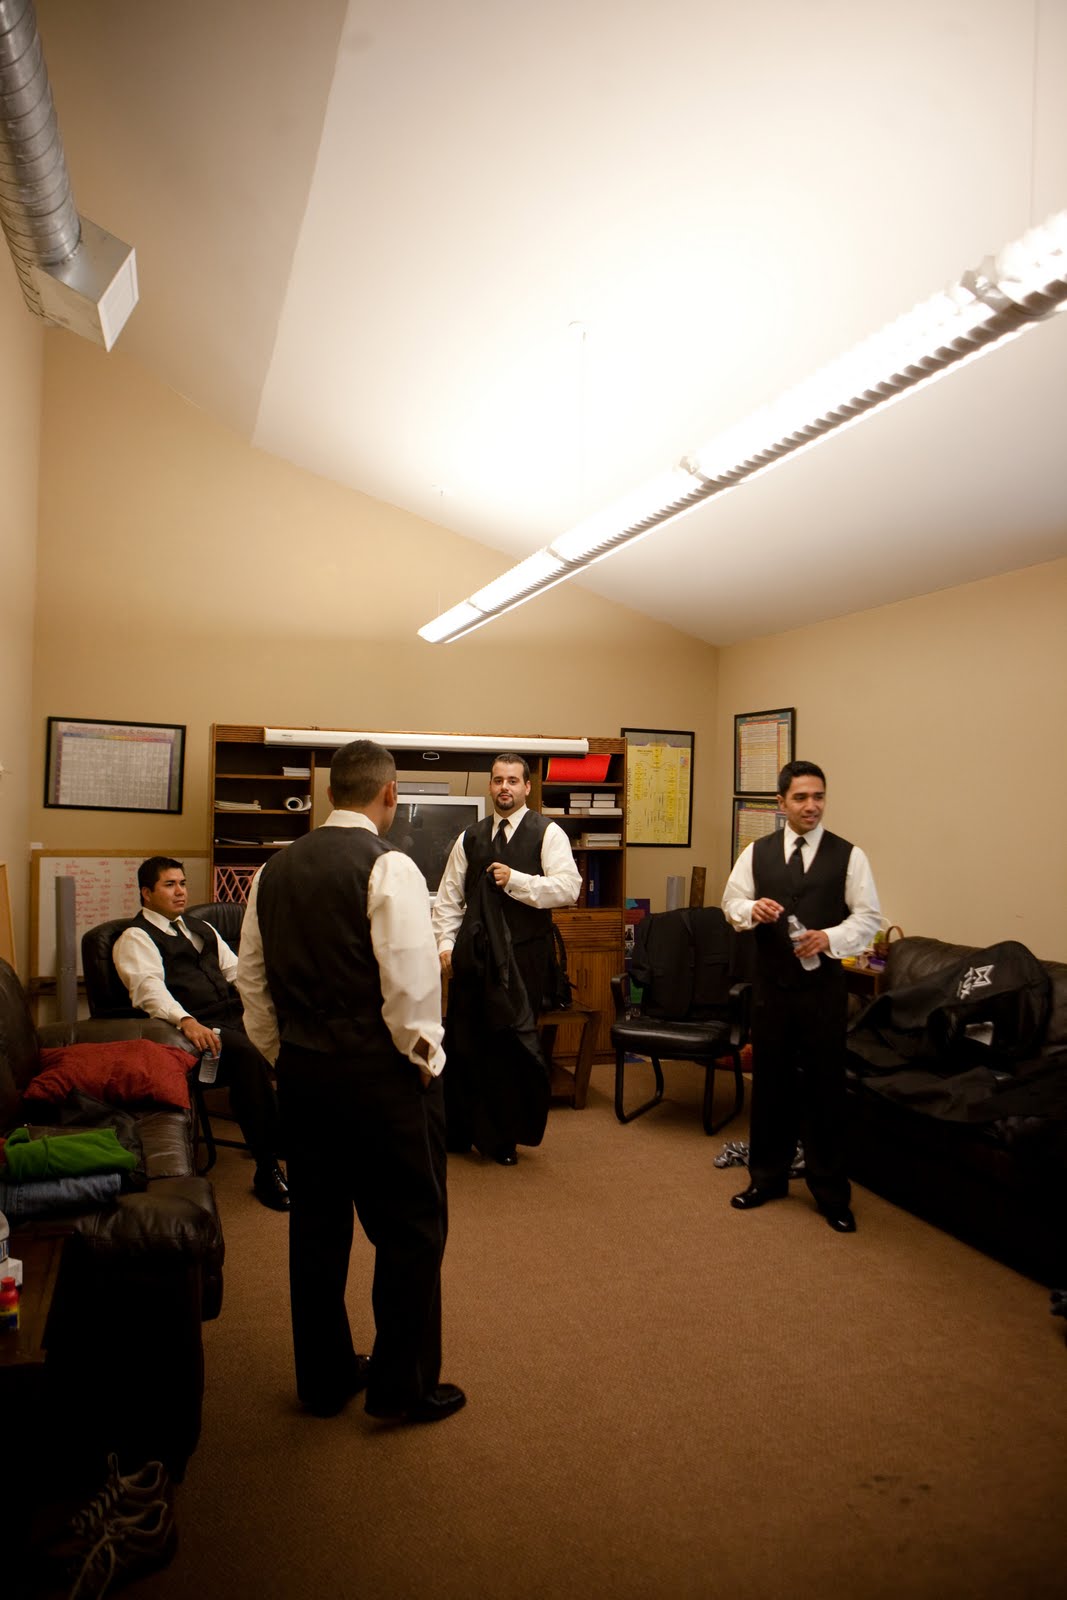
While I spent my morning tying up loose ends and getting myself pretty, Mr. Beagle's morning was far more slow paced.  He enjoyed a late breakfast with his brother, hung out with his groomsmen, and finally put his suit on and headed over to the church.


He may look calm here, but later that evening, Mr. Beagle confessed that he was just as nervous as I was.  (Or maybe he was just saying that to make me feel better about it :P)


After lounging around upstairs, they made their way downstairs to the church narthex to get their bouts pinned.


Speaking of bouts, I never really blogged about them, but here they are:


I made them from left over items used from our centerpieces, dried lavender, tallow berries, and hydrangea (that I purchased at the very beginning of planning, thinking they would become bouquets), skeleton leaves and ribbon.  The lavender is actually french lavender which holds up much, much better and doesn't break apart as easily.

They made their way outside to pass more time, take some pictures.


The groomsmen + groom.


Groomsmen, groom + ushers.


* all the pretty pictures are brought to you by Laura + Ashley of ALCollective

Want more?

10.11.2010

An Autumn Affair: Get Me to the Church!

On the morning of our wedding, I woke up surprisingly calm.  My cousin, bridesmaid S, and best girl, Sister Beagle stayed over at my house after the rehearsal dinner, while my soon-to-be husband stayed elsewhere.  We decided not to see each other until the ceremony, so my morning was without any major time constraints.  I finished putting the last minute touches on the bouts and bouquets while the girls slept.  Once everyone was up and about, we had a wonderful breakfast at one of my favorite local cafes and then, headed over to Aveda to get our hair done.  I treated all my bridesmaids to a hair-do to keep things simple (I didn't want the out-of-town girls to worry about finding a salon Saturday morning), while my sister and I had our make-up done.  Once everyone was done with our appointments (and a quick at Target), we went back to my house where the girls put on their dresses and I collected my bridal attire, accessories and any straggling wedding/reception items.  It was finally time to head to the church!

I'll admit that at this point, I started getting a little nervous.  It wasn't too terribly bad, but I completely regretted not seeing my husband before the ceremony.  I think it would have nixed all the unnecessary nerves, anxiety, and butterflies.

We arrived at the church about two hours before the ceremony started and camped out in our room:


Shortly after our photographers showed up, our day-of-coordinator arrived fully prepared:


After about an hour or so of chit chatting, I decided it was probably time to fix my hair.  Since I was wearing my hair down, my stylist just rolled my hair and gave me instructions on how to prep it when the time came.  Bridesmaid C and Sister Beagle unleashing the curls:


The trick to keeping my locks curly?  Hairspray, hairspray and more hairspray (of this variety- I love this stuff, it's light and lets your hair move while still keeping everything in place):


While we were still waiting, I had many visitors stop by to check on me.  My beautiful mother-in-law (holding one of our wedding programs and wearing the corsage I made/not blogged about...):


And several of my aunts (my mom's sister, far right):


Then suddenly, it was time for me to put on my dress!


*all images courtesy of the lovely ladies at ALCollective

Need to rewind?
- We rehearsed.

8.03.2010

An Autumn Affair in Austin: Rehearsal Time!

Why hello there all, and long time no see!  Maybe some of you might remember me, but if you don’t, I got married nine months ago (gosh, has it been that long?!) and now you’ll get to hear (and see) all about it :)

The day before the big day, I woke up exhausted.  I spent most of the week running errands and finishing up last minute projects and I really could have used a long nap or vacation.  Instead, I ran more errands with Mr. Beagle that included picking up our linen rentals, the groomsmen’s tuxes, maybe eating lunch and probably getting coffee.  When we finally arrived home, I quickly finished up my projects left over from the previous night and gathered up all our wedding crap decorations to drop off with Pam, our wonderful DOC (seriously, this woman was the. best.).  Soon after, our out of town bridesmaid and groomsman arrived at our house which meant 1)I was running behind schedule, again 2) it was almost time for the fun to begin!
We double and triple checked all our goods to make sure we had everything (marriage certificate? Check!) and then headed over to the church.

15

After a few quick introductions of everyone, we got to work.  This pretty much describes how I felt from this point on:

17(If you look closely, you’ll spot one of my tulle pomanders hanging in the background).

19

The women of my church create felt banners for important events- baptisms, marriages, funerals.  The banner, shown below, was the first thing I saw when we arrived at the church.  It was at that moment when I thought, “wow, this is really happening, EEEEEEEE!”.  The two ladies who helped me organize the church ceremony were so excited about the banner because the lettering for our names was done in purple felt, to match our wedding colors :D

23(I’m standing in front of it, but the banner states “We are one in the Lord”)

Finally, after an hour and a half of rehearsing, it was time for our rehearsal dinner!  Mr. Beagle and I hold a special place in our hearts for Opal Divine’s.  We eat there at least a couple of times a month because their food and beer selection is so good!  So, we always knew it’s where we wanted our loved ones to gather on the night before our wedding.   We decided to serve a fajitas buffet and I cannot emphasize how good the food was, mmm nooommm noommm.  They even served cheesecake for dessert, which was perfect because dessert was something that completely slipped my mind.  Unfortunately, no one took pictures of the food (insert sad face), so you’ll have to imagine what the spread looked like.  

25 28
2731  

It went by entirely too fast. 

After the rehearsal dinner, Mr. Beagle and I said our goodbyes to one another, knowing that the next day would bring more feelings of excitement and joy.  Up next, the Wedding Day!

*all photos by our groomsman, Nathan.

4.18.2010

Last Minute Project(s): Prettified Pots + Paper Products & Programs

Alliteration much?

Part 1: Prettified Pots 

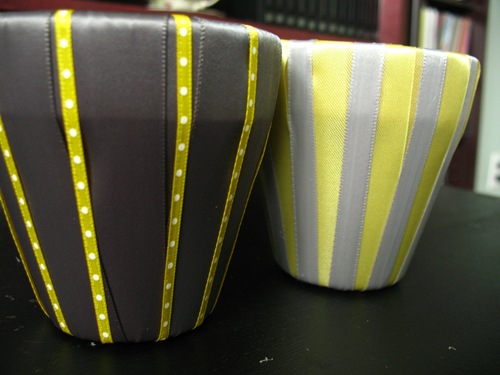
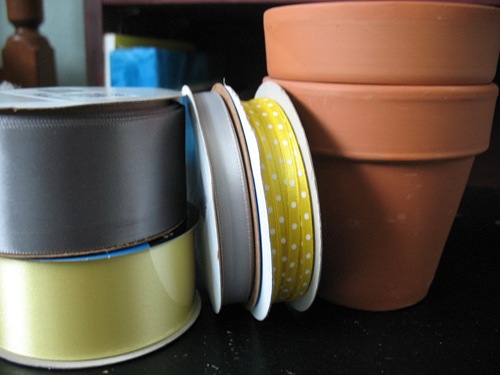
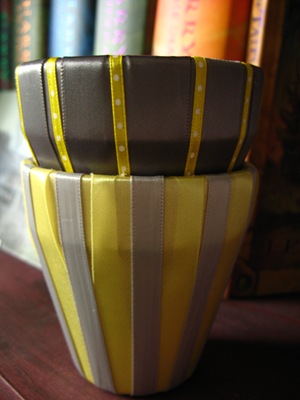
I ended up doing our table assignments, um, the week before our wedding- finishing the last of them around fifteen minutes before we left for our rehearsal.  This is something I would NOT recommend, as it was NOT  fun, at all.  I knew I didn’t want to have place cards, just escort cards (if you don’t know the difference- I didn’t- read here), and because I had no idea what to do (at this point, my brain was fried), I emailed my wonderful DOC freaking out asking for advice.  She suggested nixing the escort cards, and made my life somucheasier by recommending a table assignment card for each table instead of a card for each person.  I decided to go with one of her suggestions for creating the table assignments and high-tailed it over to JoAnn’s to pick up supplies.  For 22 tables, I ended up buying 22 terra cotta pots of varying size (the cheap ones) and around seven to ten spools of ribbon.  Why did I need these supplies?  So I could make these**:
IMG_3613
**No, my wedding colors didn’t suddenly change to grey and yellow.  Because this was a last minute project, I did not have time to take pictures.  Fear not!!  because I have a tutorial for you below!

Much, much better than what they started out as, don’t you think?
IMG_3588

Here’s the “how to”:

You’ll also need a glue gun in addition to the pots (for one tiny pot I used about half a spool of ribbon/ ~6’ of ribbon- this sounds like a lot, but it really isn’t).  Also, you can cut down on your costs by buying supplies individually/early on and using coupons.  I LOVE COUPONS. 

Start by hot gluing one end of the ribbon to the pot (picture 1), then pull the ribbon straight down along the side of your pot, holding it on the glued edge, so it doesn’t move around (2).  Make sure once more that the ribbon is straight, then place a glue line along the bottom edge of the pot (3) and press the center of the ribbon down first, then pull either side further in and press down so that the ribbon curves to the pot (4).  I should also note that I left the ribbon on the spool while gluing it to the pot and only cut after the end of the ribbon was glued to the bottom of the pot.

IMG_3597IMG_3598IMG_3599IMG_3605

Repeat steps 1-4 for each quadrant of the pot.  I glued the first two across from each other, and likewise with the second two so that there was even spacing amongst all the strips:

IMG_3606IMG_3607

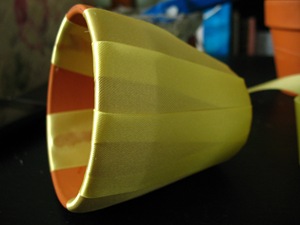
Then repeat steps 1-4, gluing two ribbon strips between each quadrant strip:
IMG_3610
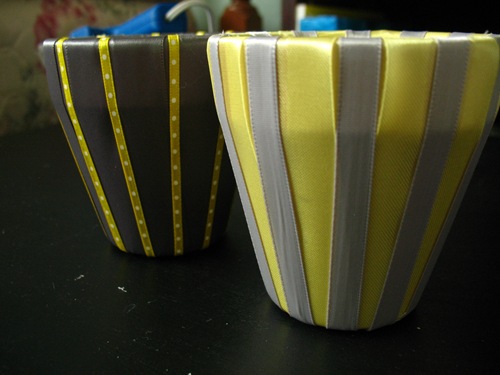
Do this until your entire pot is covered.  I personally like the overall look of darker ribbon because it is less see through, but that’s just me.  After the pots were covered, I went back and glued these thinner ribbons using the same method:
IMG_3616

In addition to holding table assignments, I think they would look lovely as centerpieces :)
IMG_3618

Part 1.5:  Paper Products

I have a secret, wanna know what it is?  I downloaded a trial version of Adobe Illustrator, for FREE, 2 weeks before the wedding and made our table assignments, table numbers, and programs using it.  (Miss Ribbons made her awesome invites using it too!)  To spice up our table numbers/assignments/programs, I bought a vector image from iStock.  Here is what our table numbers looked like:
 table number copy

I printed them out on ivory cardstock  left over from our table assignments. I bought the cardstock from JoAnn’s, which was on sale for 50 sheets/ $2.50.  Cheap?  Yes!  The best quality?  Probably not, but they served their purpose well.

I printed out each number twice (front & back of our table numbers).  After all 44 squares were printed and cut, I glued each front and back to a ~12” dowel of basal wood (also found at JoAnn’s) and then stuck/hot glued them into a half-cylinder of styrofoam covered with moss.   Yes, I admit, this sounds ghetto and since I have no pictures of this process, you’ll have to trust me when I say, THEY DIDN’T LOOK THAT BAD :)

For the table assignments, I used a similar vector image to the one shown above in our table numbers, and printed them out on 5”x7” sheets of cardstock, stuck them to ~12” dowels of basal wood, and hot glued them into the center of the prettified pots that were filled with styrofoam, topped with moss.  Again, no pictures of this process but I promise, THEY DIDN”T LOOK THAT BAD EITHER.

Part 2:  Programs
I used a similar vector image for our programs and laid out each page (4 pages total) in Illustrator.  This was so much easier to do in Illustrator than in the crappy version of Photoshop that I have- um version 7.0 anyone?  After I got everything looking good, I printed them out on cardstock.  I was able to get two pages per sheet of cardstock and after, some trial and error, I printed on the reverse side also. 
The end result?  Our 8-page program, only used up two pages of cardstock!

I HAVE ANOTHER SECRET:  I was going to cut them all out myself.  I'm pretty sure that when I told Mr. Beagle this, he looked at me like I had two heads  But I didn’t, because I discovered that Office Depot would do it for around five dollars.  Sweet!  So after Office Depot took care of my dirty work in around two minutes (that would have taken me, um, several hours) , I took home my freshly cut paper to assemble our programs.  I hole punched two holes in each sheet and then tied both sheets together with some 50 cent ribbon from JoAnn’s .


Want a sneak peak of what they looked like at our wedding?

10.24.09 W0672photo by our wonderful photog:  Ashley Smith

Are you doing assigned seating at your wedding?  Are you doing anything creative to display escort cards/ place cards/ table assignments?

4.07.2010

Last Minute Project: Wedding Party Gifts

First up: The Guys

I had absolutely no idea what Mr. Beagle’s groomsmen would like as gifts, so I let him take full control of the reigns on this task. He started and ended his search online, getting all that he needed from this site. For the groomsmen, Papa Beagle, and FIL Beagle, he decided to get very large beer mugs, personalized with their initials:


The ushers got flasks, personalized with their initials:


For the Girls:

I gave each of my bridesmaids a grey wrap, to keep them warm in case it was cool later in the evening. The color looked great with their purple dresses and I think it's neutral enough for them to wear again:


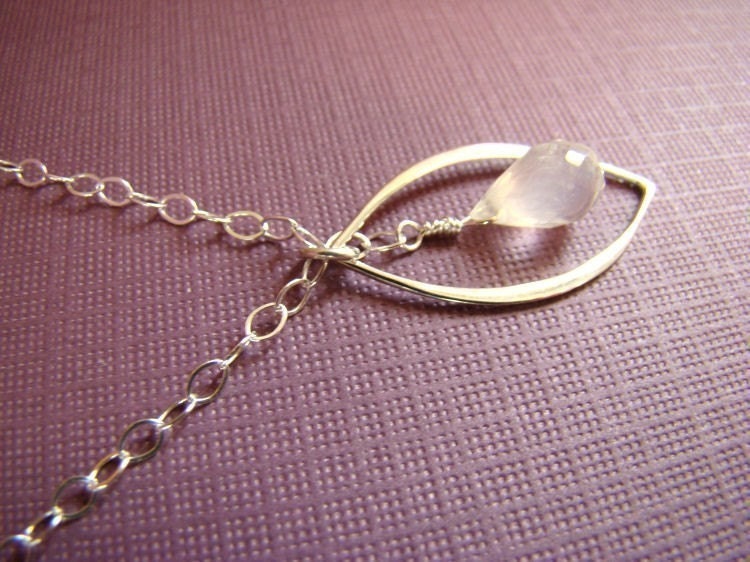
I also decided to get them a piece of jewelry to wear, if they chose, on the big day. I was debating between earrings or a necklace and finally decided on a necklace. I purchased them all from Jeweled Blossoms (I purchased items from her shop prior to the wedding, so I knew her products were great). Again, I tried to choose an item that would both work with their dresses and would be something they could wear again.


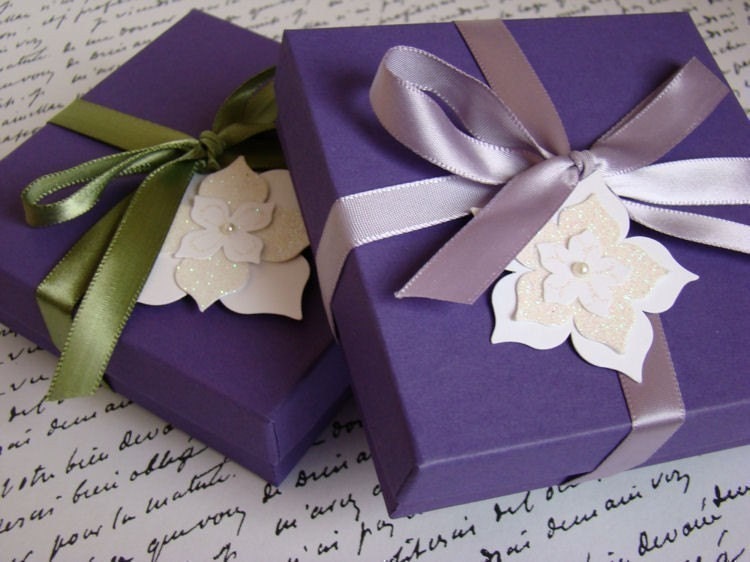
Coincidentally, they were each packaged in purple boxes... appropriate, no?


Finally, I intended to make each bridesmaid a clutch to hold all their necessities, but I ran out of time and only completed two :( So, my MOH ended up receiving one, while I used the other. They were fairly simple to make; however, because this was a last minute project, I didn't take any pictures of the DIY process- a tutorial will have to come later. The (removable) flower was graciously sent to me by Mrs. Margarita :)


Our peeps received their gifts at our rehersal dinner, the night before the wedding and I think they were all well liked! 

What are you getting your bridesmaids/groomsmen? 

4.05.2010

Beagles at the Beach: Part IV

After our excursions to Cabo San Lucas and Santa Maria, we spent the next few days exploring the city closest to where we were staying:  San Jose del Cabo.  In this small town, resides a beautiful mission, which is the foundation of the city.

IMG_3302

IMG_3286 
This is a close up of the tiled detail above the church entrance:

IMG_3288

The alter:

IMG_3291

In Hispanic Catholic culture, the Virgin Mary is a very important figure.  This is a shrine dedicated to her:

IMG_3293

The town plaza is also an important part of the history of San Jose del Cabo. While we were there, local towns people were holding political rallies for an upcoming election.

IMG_3284

IMG_3301

IMG_3334

The architecture around the San Jose was beautiful.  Walls were painted in bright colors, metal and wooden doors everywhere, and nooks and crannies filled with small shops.  (This town reminded me so much of Santa Fe, NM).

    IMG_3296 IMG_3298IMG_3323

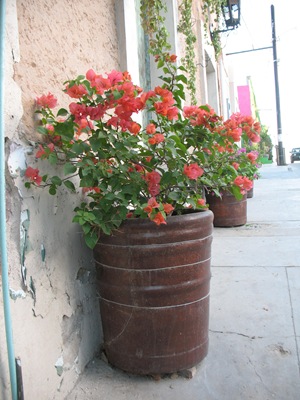
Bougainvilleas were blooming everywhere, so pretty.

IMG_3300IMG_3325

We came across some very large Catrinas (on stilts) wandering around the square.  They appeared to be looking for tips, so we admired them from afar.

IMG_3333

One evening, we decided to have dinner in the city. We chose this place- La Panga:  (One of the many advantages to traveling with someone who is bilingual is that you can find out all the best places to eat from the locals :D)

IMG_3327

IMG_3330

While Mr. Beagle really only cares about the quality of food at a restaurant, I have to admit, ambience plays a big role in my dining experiences.  La Panga had the best romantic atmosphere with twinkle lights every where and secluded tables.  Love, love, love.

IMG_3318

And to meet Mr. Beagle’s requirement, the food was pretty wonderful too!  I dined on salmon atop mashed potatoes, covered in a very yummy cilantro sauce,  and grilled veggies.

IMG_3313

Mr. Beagle was kind enough to wait to dig into his food so I could take this picture :)  He had a traditional Mexican dish:  Chicken Mole with rice & plantains.

IMG_3316

The waiter found out we were on our honeymoon and kindly brought us this beautiful dessert.  It reads Felicidades! (Congratulations!) and portrays two boats meeting.  It was almost too pretty to eat, almost.

IMG_3320

Two happy Beagles after our tummies were filled with the delicious food.

IMG_3311

Before we left our relaxing vacation, we took a few more walks on the beach. 
We admired the rocky beaches and the sandy ones.

IMG_3305

IMG_3309

We took in one last sunset.

IMG_3369

IMG_3378

And before we boarded our plane to leave, I snuck one last picture of the mountains looming in the distance.

IMG_3401

When we finally arrived back in Austin, we were very well rested and relaxed.  It was the perfect honeymoon for the both of us (and I highly recommend it to anyone looking to lounge around for a week).  We also came home to a very, very nice surprise….. Our wedding pictures!  Stay tuned for Beagle recaps to commence very, very soon!

How did we get here?

Beagles at the Beach:  Part III
Beagles at the Beach:  Part II
Beagles at the Beach:  Part I